top of page
Search

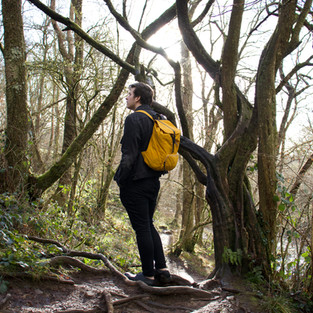
On the 18th June I got to be a part of Stwff Market in Cardiff! It was a whole lot of fun meeting some amazing artists & getting to see my customers face to face! I really loved the experience, but I was a little nervous and unsure of what to expect.


I've put together a (slightly awkward) vlog of my experience, including prep, my table set up and how it went on the day! You can watch it below, or just keep scrolling to see a round up of my tips & tricks!


Setting up your table / booth

Going into it, setting up my table was the thing that overwhelmed & excited me the most!
I spent a lot of time looking at examples of what other artists had used to set up their table. I had quite a wide variety of products I wanted to take with me. From jewellery, to ceramics, to wash tape, stickers & hats!

I've saved you all the tiresome searching & have listed all of the display items I used to set up my table :-)


Washi tape: Nail polish rack

Stickers: Nail polish rack


Other: Table cloth

My Tips for your first art market:

1. Start small & local

2. Practise your set up at home first!!

3. Make more than you think you'll need - you can always bring it home

4. Make your stall eye catching - think banners, displays, signs

5. Be friendly & welcoming

6. write a list, to make sure you don't forget anything

7. If you can, take a card reader - 90% of my sales were via card

8. Take a cash float

9. Make a price sheet for yourself so you can check how much an item is

10. Mingle! Have a chat with the other sellers, art markets are a really great place to network!

11. Take business cards! - lots of them


103 views0 comments


TAP is a children's book (currently unpublished) which I have written and illustrated for my final major at Swansea College of Art. It's all about a little woodpecker, named Tap, who wants nothing more than to sing with the other birds in the annual carnival. I hope for the book to encourage and celebrate difference and individuality in a colourful way.

I thought I would be interesting to spice things up and make a little behind-the-scenes process video of one of my recent illustrations. My illustration process changed a lot for this brief, I allowed myself to be a lot more experimental with collage, paint and digital media.


MEDIA USED


  • Schminke Horadam Gouache

  • Faber Castell Polychromos coloured pencils

  • Daler Rowney Graduate Acrylic

  • Collage

  • Digital (Photoshop, Wacom Cintiq 27QHD)


78 views0 comments


- Saving Sylk Wood -


All is great in Sylk Wood, until one day Owl returns home from his flight with the terrible news that the forest is shrinking.

Take a journey through the forest, following the adventures of three unlikely friends: a fox, a rabbit and a squirrel as they search for answers and try to uncover why their forest is shrinking. 


The Idea


Right from the start, I knew I wanted my book to be for a young audience. I don't know where my fascination with children's book illustration comes from, I think I've just always loved it. The colours, the playful shapes and imaginative subject matter all together make it seem magical to me. 


The brief was pretty open, the only guideline was that the narrative had to follow the theme "from here to there". I began this project by studying examples of children's narratives that I love as well as studying some illustrations from my favourite children's books.


One of my favourite illustrators and biggest inspirations is Rebecca Green. Her work is just gorgeous! I love how she somehow manages to capture a playful, almost child-like feeling with her scribbly colouring of pencil on top of gouache. It's something that I would one day love to master and be able to implement into my own work. - Click the image to check out her Blog!


Nature - Finding my inspiration


The theme I was given was so broad that at first it seemed like I would never be able to decide on a narrative which I wanted to illustrate. I played around with a couple of ideas but I eventually decided that it would be best to take inspiration from what inspires me the most. I truly believe that as an artist it is important to take time to notice the little things which inspire you and to explore them to their full potential. I think that if we fill up our mental libraries with shapes, colours or even patterns that inspire us then when it comes to making original artworks we will have a huge catalog of new things to chose from which will make our artworks much more unique.

My biggest inspiration is nature. I love all things flora and fauna! In fact, going on long walks is one of my favourite pastimes and whenever I do I always take my Camera and my sketchbook for drawing and pressing flowers.


So, with that in mind, I decided to write a story about nature. I really wanted the story to teach a hidden lesson about deforestation and the importance of caring for the natural world as this is something else I'm really passionate about. 


Character Design


Almost every narrative has characters so this is where I began. I wrote down a long list of about 25 forest animals native to the UK which I thought could make possible interesting characters. I started sketching, really trying to stylise the animals and make them all visually go together in one set. 


The sketches started off really rough - as I expected - but after a couple of days of redrawing and refining them I had a set of characters which I was really pleased with!


The Story


I attributed some of the natural characteristics of the animals to my characters in my story. For example, Rabbit is quite anxious and jumpy just like real rabbits. She is also kind of sassy and she stomps her feet when she's mad. I thought this added more fun to the characters and brought them more to life. It was a really enjoyable process too!

Next came the part where I started writing my narrative. Without giving too much away, I wanted the story to be written with the animals level of understanding. I thought this added more of a sense of mystery and uncertainty and also allowed the reader to empathise with the animals and their situation more effectively. 

I came up with my beginning, middle and end, and sat down to write my story. 

It ended up being quite long, so the writing process took me a good couple of weeks.


Thumbnail Sketches


I printed out my narrative and made some final adjustments to the text. I also began to draw out some really rough sketches of my ideas for illustrations which I though would work well with the text.


This stage lasted weeks. I drew out rough thumbnails for every section of text that I wanted to illustrate. - Here are just a few of my first sketches for the book.


Dummy Book


 It was a requirement for the brief to construct a dummy book which, if you don't know, is basically a rough handmade book that includes all of the thumbnail sketches in sequence and position. If I were to take this book to an editor then I would show them the dummy book as a rough to give a strong impression of the feel of the book without restricting the possibility of making any changes to it. 


Finalised Spreads


Finally! After almost a year since I had first started thinking about this story it was time to sit down and illustrate the finished spreads. For the brief I was given I was only required to do 4 double page spreads. So, I chose to illustrate 3 double page spreads and the cover for the book. I used my drawing tablet and photoshop to create the artwork.         

All of the textures you can see in the final illustrations were scanned in and overlaid on top of my layers,  I was really pleased with how this turned out in the end. It's not a technique that I've ever used in my work before but I think that it gives the book a really tangible and playful edge.  


I hope you've enjoyed reading through the process behind making my first children's book.


Thank you for reading!

38 views0 comments
1
2
bottom of page